
Table of Contents
Using Workgroup Director
Using Workgroup Director
You can monitor the performance of your concentrator, switch, or adapter by using Workgroup Director menus. Several of these menus give you access to windows in which you can monitor the device status by viewing or changing parameters. For example, you can configure and interpret Media Access Control (MAC) parameters, monitor each port, and manage SNMP network management stations.
Workgroup Director provides a graphical representation of Adapter and Hub windows. Figure 51 shows the CDDI adapter display for a single attachment station.
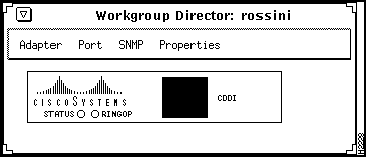
Figure 5-1 Workgroup Director Adapter Displays
Workgroup Director also displays a graphical representation of the concentrator. Figure 52 shows the WSC1000, WSC1100, and Catalyst Workgroup Switch displays. See the section "LED Displays" for a description of the LEDs.
.
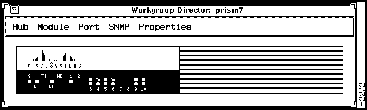
Figure 5-2 Workgroup Director Concentrator and Switch Displays
The LEDs in the adapter and concentrator or switch displays are hot; that is, you can click on the LED to activate the Hub, Adapter, or Port windows, as follows:
- Click on the S or STATUS LED to view the Hub (or Adapter) window.
- Click on one of the Port LEDs to view the Port window. Each of the ports on the concentrator has an associated port window in the Workgroup Director concentrator display. There is one port window for Ethernet ports, and a different window for FDDI ports.
The LEDs on the displays are color coded to indicate the status of the adapter, concentrator, or port. The following sections describe the meaning of the LEDs and colors.
The adapter displays have a STATUS and a RINGOP LED, as shown in Figure 51:
- STATUS LED---The adapter performs a series of self-tests and diagnostics. If all the tests pass, the STATUS LED appears green. If any test fails, the Status LED appears red.
- RINGOP LED---The RINGOP LED indicates which ring is operational by its color, as shown in Table 5-1.
Table 5-1 Adapter RINGOP LED Description
| Green |
Primary ring operational (secondary ring may also be operational) |
| Orange |
Secondary ring operational (primary ring nonoperational) |
| Off |
Both rings nonoperational |
The following LEDs on the WSC1000 and WSC1100 concentrators indicate the concentrator status, whether or not the primary or secondary ring is operational, the state of that ring, and the status of each port:
- S (STATUS) LED---The concentrator performs a series of self-tests and diagnostics. If all the tests pass, the S LED appears green. If any concentrator test fails, the S LED appears red.
- RO (RINGOP) LED---The RO LED indicates which ring is operational by its color, as shown in Table 5-2.
Table 5-2 WSC1000/1100 RO (RINGOP) LED Description
| Green |
Primary ring operational (secondary ring may also be operational) |
| Orange |
Secondary ring operational (primary ring nonoperational) |
| Off |
Both rings nonoperational |
- Thru---In Thru mode, indicated by a green LED, ports 1/A and 2/B are connected to the primary and secondary paths.
- Wrap A---In Wrap A mode, indicated by a green LED, port 2/B is isolated, and port 1/A is connected to the ring.
- Wrap B---In Wrap B mode, indicated by a green LED, port 1/A is isolated, and port 2/B is connected to the ring.
- Link Status LED---The Link Status LEDs 1 through 10 indicate the connection state of the link. Table 5-3 describes these LEDs.
Table 5-3 WSC1000/1100 Link Status LED Description
| Green |
The link has connected properly with the remote device. |
| Orange |
Signal detected, but the link has failed to connect or is in the process of connecting. A dual-homed station causes the Status LED of an M port connected to the station A port to appear orange. |
| Off |
No signal detected. |
The traffic meter displays the current traffic load on the primary ring. The green LEDs in the traffic meter indicates an approximate percentage of load. Table 5-4 shows the meaning of the traffic meter LEDs for the WSC1000.
Table 5-4 Traffic Meter LEDs for WSC1000
| 10 |
90 to 100 |
| 9 |
75 to 89 |
| 8 |
60 to 74 |
| 7 |
45 to 59 |
| 6 |
30 to 44 |
| 5 |
20 to 29 |
| 4 |
15 to 19 |
| 3 |
10 to 14 |
| 2 |
6 to 9 |
| 1 |
1 to 5 |
Table 5-5 shows the meaning of the traffic meter LEDs for the WSC1100.
Table 5-5 Traffic Meter LEDs for WSC1100
| 10 |
91 to 100 |
| 9 |
81 to 90 |
| 8 |
71 to 80 |
| 7 |
61 to 70 |
| 6 |
51 to 60 |
| 5 |
41 to 50 |
| 4 |
31 to 40 |
| 3 |
21 to 30 |
| 2 |
11 to 20 |
| 1 |
1 to 10 |
The following LEDs on the Catalyst Workgroup Switch indicate its status, whether or not the primary or secondary ring is operational, the state of that ring, and the status of each port:
- S (STATUS) LED---The switch performs a series of self-tests and diagnostics. If all the tests pass, the S LED appears green. If any hub test fails, the S LED appears red.
- RO (RINGOP) LED---The RO LED indicates which ring is operational by its color, as shown in Table 5-6.
Table 5-6 Catalyst Workgroup Switch RINGOP LED Description
| Green |
Primary ring operational (secondary ring may also be operational) |
| Orange |
Secondary ring operational (primary ring nonoperational) |
| Off |
Both rings nonoperational |
- TH (Thru)---Indicated by a green LED, ports 1/A and 2/B are connected to the primary and secondary ring.
- WA (Wrap A)---Indicated by a green LED, port 2/B is isolated; port 1/A is connected to the ring.
- WB (Wrap B)---Indicated by a green LED, port 1/A is isolated; port 2/B is connected to the ring.
- 1---This is the port 1 status LED that appears green if port A is connected to the ring. If the port is receiving a signal, but fails to connect or is dual-homed, the LED appears orange. The LED is off when no signal is present.
- 2---This is the port 2 status LED that appears green if port B is connected to the ring. If the port is receiving a signal, but fails to connect or is dual-homed, the LED appears orange. The LED is off when no signal is present.
- Ethernet Port Activity LED---This LED is the upper LED for ports 3 through 10. It appears green for approximately 50 milliseconds when the port is transmitting a packet, yellow when receiving a packet, and red for collisions.
- Ethernet Port LG (Link Good) LED---This LED is the lower LED for ports 3 through 10. It appears green if the link integrity is good.
Workgroup Director has six top-level menu items:
- Adapter (Adapter display only)---This menu item only appears in Adapter displays; it displays a window containing adapter configuration parameters.
- Hub (Hub display only)---This menu item only appears in Hub displays; it displays a window containing hub parameters.
- Module (Hub display only)---This menu item only appears in Hub displays; it displays a window containing additional hub parameters.
- Port---This menu item displays a set of parameters that provides a snapshot status of each port on the hub.
- SNMP---This menu item displays entries for data collected by the SNMP agent to control and monitor the hub.
- Properties---This menu item displays parameters that let you specify the host, community, time-out, and retry interval.
Each Workgroup Director window has at least one of the following five basic window command buttons that allow you to change the data displayed in the window. Scroll to the bottom of each window to see these buttons.
- Get---Retrieves current parameters of the information currently displayed. The Get command button refreshes the parameter values to reflect the new selection.
- Get Next---Retrieves the next entry in a table. The Get Next command button refreshes the parameter values for the next entry in the table.
- Set---Saves any changes you make to configurable parameters. If you change a parameter but do not click on the Set button, Workgroup Director will ignore your changes.
- Reset---Restores the window to its initial parameters if you made changes to one or more parameters, but did not set them. Clicking on the Reset button restores only those changes made since you last set them.
- Close---Closes the window. Note that any changes made to configurable parameters, but not set, is ignored.
Copyright 1988-1995
©
Cisco Systems Inc.