
Table of Contents
Installing Workgroup Director on a SPARCstation
Installing Workgroup Director on a SPARCstation
This chapter describes how to install Workgroup Director on your SPARCstation running SunOS 4.x (Solaris 1.x) or Solaris 2.x (SunOS 5.x). It also describes how to start Workgroup Director both as a standalone application and from a network management system, such as SunNet Manager or HP OpenView. This chapter also includes information about removing Workgroup Director from your system.
To install Workgroup Director, you must meet the following requirements:
- Be familiar with the UNIX operating system.
- Know your superuser password.
- Have the following amounts of disk space depending on the version of Workgroup Director you are loading:
- SunOS 4.x OPEN LOOK 1400 kilobytes (KB)
- SunOS 4.x Motif 2000 KB
- Solaris 2.x OPEN LOOK 1200 KB
- Solaris 2.x Motif 1500 KB
- Use the df command to check available disk space.
There are installation floppy disks for each version of Workgroup Director available on a SPARCstation. Choose the version of Workgroup Director you want to install depending on whether you are running SunOS or Solaris and depending on whether you are using the Motif or OPEN LOOK graphical user interface.
Remove any old versions of Workgroup Director before installing the new version. See the section "Removing Workgroup Director from Your System" later in this chapter.
To install Workgroup Director on SunOS 4.x, perform the following steps (after you remove any old versions of Workgroup Director):
- Step 1 Log in to your system as root.
- Step 2 Enter cd /usr to change the directory to /usr.
- Step 3 Choose the SunOS 4.x Motif or OPEN LOOK installation disk and insert it into the SPARCstation floppy disk drive.
- Step 4 Enter tar xvf /dev/rfd0 to copy files from the installation disk to your hard disk. All files are stored in the WGD subdirectory.
- Step 5 Enter cd WGD to change to the WGD directory
- Step 6 If you plan to use Workgroup Director with SunNet Manager, make sure SunNet Manager is installed in the /usr/snm directory. If SunNet Manager is installed in another directory, set the environment variable SNMHOME to point to the correct directory before running the installation program.
- If you plan to use Workgroup Director with HP OpenView, make sure HP OpenView is installed in the /usr/OV directory. If it is installed in another directory, set the environment variable OVWHOME to point to the correct directory before running the installation program.
- Step 7 Enter INSTALL to run the installation program. The installation program uncompresses the files, then lists the files as they are installed. When installation is complete, the message "Installation finished" appears.
- Step 8 Continue with the section "Starting Workgroup Director As a Standalone Application" or "Starting Workgroup Director from a Network Management System."
To install Workgroup Director on Solaris 2.x, perform the following steps (after you remove any old versions of Workgroup Director):
- Step 1 Choose the Solaris 2 Motif or OPEN LOOK installation disk and insert it into the SPARCstation floppy disk drive.
- Step 2 Enter volcheck.
- Step 3 Enter pkgadd -d /dev/floppy0 to begin the installation.
- The installation program lists the packages available on the floppy disk and asks which package you want to install.
- Step 4 Enter WGD.
- The program indicates that the package contains scripts that will be executed during the installation process and asks if you want to continue installing the software.
- Step 5 To continue, enter y.
- The installation program lists the files as they are installed and verified. When installation is complete, the message "Installation of Workgroup Director was successful" appears.
- Step 6 Continue with the section "Starting Workgroup Director As a Standalone Application" or "Starting Workgroup Director from a Network Management System."
To start Workgroup Director as a standalone application, enter the following command:
wgd -h host [-c readCommunity] [-C writeCommunity]

[-t timeout] [-r retry] [-p port] [-P polling]
Following are explanations of the command options:
- -h host---The concentrator or workstation name or IP address. The name must be configured in the /etc/hosts file or NIS database.
- -c readCommunity---The string used for reading SNMP requests. The default is "public."
- -C writeCommunity---The string used for writing SNMP requests. The default is the same as the string for readCommunity.
- -t timeout---The number of seconds allowed for an SNMP request to respond. The default is 2 seconds.
- -r retry---The number of times to retry a request that has timed out. The default is 3.
- -p
port---The UDP port number. The default is 161.
- -P
polling---The polling interval. The default is 1 second.
If you want to change a default value when starting Workgroup Director, add the letter of the command (preceded by a hyphen), followed by a space, and then the new value. For example, if you want to change the read community string from public to cisco, enter the following command when starting Workgroup Director:
/usr/bin/wgd -h <host> -c cisco
The way you start Workgroup Director from a network management system depends on the network management system you are using.
To start Workgroup Director from SunNet Manager, perform the following steps:
- Step 1 Save the current configuration loaded in SunNet Manager by selecting Save from the File menu.
- The Load/Save window appears.
- Step 2 Enter /usr/snm as the name of the directory in the Load/Save window:
- Step 3 Enter snm.db as the filename.
- Step 4 Click on the Save button.
- Step 5 Quit SunNet Manager.
- Step 6 Enter /usr/snm/bin/snm -i /usr/snm/snm.db to reinitialize and reload SunNet Manager.
- Step 7 Click on the Edit button and drag the mouse through the following menu selections:
- Create
- Component
- cisco-wsc1000, cisco-wsc1100, or cisco-wsc1200
- The Create window appears.
- Step 8 In the Create window Name field, enter the name of the concentrator or switch that you want to monitor.
- Step 9 Enter the IP (Internet Protocol) Address of the concentrator or switch in the IP Address field.
- Step 10 If you are running SunNet Manager 2.0, enter your community string information.
OR
For SunNet Manager 1.2, add the community string information to the /var/adm/snm/snmp.hosts file.
- Step 11 Click on the Apply button to save these changes.
- The object will now appear on your SunNet Manager display.
- Step 12 To start Workgroup Director, place the pointer on the symbol representing the concentrator and use the left mouse button to display the menu for the concentrator.
- Step 13 For SunNet Manager 1.2, select Workgroup Director from the User Commands menu.
OR
For SunNet Manager 2.0, select Workgroup Director from the Tools menu.
- The Workgroup Director display appears. Figure 21 shows an example of the Catalyst Workgroup Switch display. You will learn how to use this display in Chapter 5, "Using Workgroup Director."
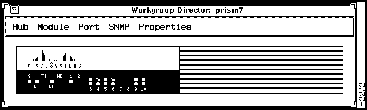
Figure 2-1 Workgroup Director Display
If you are using HP OpenView network management software on your SPARCstation, you can start Workgroup Director in one of two ways: from the HP OpenView menu and from the symbol representing a device on the HP OpenView screen. If you want to use the symbol, you must configure it to execute Workgroup Director. This section explains how to start Workgroup Director from the OpenView menu and from an executable symbol. It also explains how to load the MIB files that provide additional information for the concentrator and adapter.
Before you can start Workgroup Director, you must quit your current HP OpenView session as follows:
- Step 1 Quit HP OpenView if it is running by selecting Exit from the File menu.
- Step 2 Enter /usr/OV/bin/ovw to start HP OpenView.
- Step 3 To start Workgroup Director from the HP OpenView menu, proceed as follows:
- Select the symbol representing a device with an SNMP agent, such as a concentrator.
- Select Workgroup Director from the Monitor menu.
Note If Workgroup Director cannot communicate with the SNMP agent, it may be due to an incorrect community string. Configure SNMP community strings for the default case and/or specific nodes by selecting SNMP Configuration from the Options menu.
- Step 4 To configure a symbol to execute Workgroup Director, proceed as follows:
- Place the pointer on the symbol representing the concentrator, and use the left mouse button to display the menu for the concentrator.
- Select Describe/Modify Symbol from the Concentrator menu.
- The Symbol Description dialog box appears.
- Click on the Execute button in the Symbol Description dialog box.
- Select Workgroup Director from the Application Action list.
- Click on the Target Objects button.
- The Target Objects dialog box appears.
- Click on the Add button to place the object name in the Target Objects list.
- Click on the OK button.
- The Symbol Description dialog box appears.
- Click on the OK button in the Symbol Description dialog box.
- The HP OpenView screen reappears.
- If OpenView displays an error message stating that the action and target objects are not compatible, make sure that isSNMPSupported is selected for the object. Use the View/Modify Attributes option from the following menu path:
Describe/Modify Object> General Attributes> View/Modify
Attributes
- Double-click on the executable symbol to start Workgroup Director.
- Step 5 To load the MIB files, do the following:
- Choose Load/Unload MIBs, then SNMP from the Options menu.
- The MIB Load/Unload MIBs dialog box appears, listing the MIBs currently loaded.
- Click on the Load button.
- The Load MIB From File dialog box appears, listing the files in the default directory.
- Select the cisco-adapter file and click on the OK button.
- The MIB is loaded and the MIB Load/Unload dialog box reappears.
- Click on the Load button again.
- Select the cisco-stack file and click on the OK button.
This section describes what to do if you want to permanently remove Workgroup Director from your system or to remove the old version before installing a new version of the software. The deinstall scripts, described in this section, remove all files from the Workgroup Director directory as well as files that were installed elsewhere.
To remove Workgroup Director from SunOS 4.x, perform the following steps:
- Step 1 Enter cd /usr/WGD to change to the installation directory.
- Step 2 Enter DEINSTALL to run the deinstall program.
- The program lists the files as they are removed and displays "Done" when the process is finished.
To remove Workgroup Director from Solaris 2.x, perform the following steps:
- Step 1 Enter pkgrm WGD.
- The program asks if you want to remove this package.
- Step 2 Enter y.
- The program indicates that the package contains scripts that will be executed during the removal process and asks if you want to continue the process.
- Step 3 Enter y to continue.
- Files are listed as they are removed. When the process is finished, the message "Removal of Workgroup Director was successful" appears.
Copyright 1988-1995
©
Cisco Systems Inc.